Showing posts with label sewing. Show all posts

11.07.2016

Halloween 2016

Ya'll, Halloween about did me in this year...four consecutive nights of parties or trick or treating was such a blast, but that is a LOT of candy and forced social interaction for a three-year-old who's just starting to come out of his shell around people. Good news is, we definitely got plenty of use out of the boys' costumes! And of course now we have plenty of chocolate for after kids' bedtimes. To be honest, I was about to bow out of trick or treating on actual Halloween night because Jake wouldn't have any clue and I was pretty worn out. But then I got to thinking and realized its never a good choice to miss out on free candy! Monday night proved to be the most lucrative night in terms of the good candy--one house gave out full-size Snickers!--so obviously we're all glad we stuck it out. ;)

We kicked off the weekend with trick or treating at one of Jake's favorite parks that he calls the "baseball park" thanks to the two baseball diamonds near the playground. We walked the loop with friends, spent time on the playground and tried not to sweat to death because its been 85 degrees here. What is going on with that?!

Probably one of my favorite pictures right there! I love those guys.

For Narnia! ;)

On Saturday, one of Jake's little friends had a Halloween party. We ate killer stuffed crust pizza, decorated pumpkins with sticker faces (brilliant! so fast and not messy) and then the kids watched a Mickey Halloween movie while the adults talked around the fire. Deric helped Jake put stickers on his pumpkin and couldn't stop laughing at how tiny the face was on such a big pumpkin. Jake was so proud of his pumpkin face! He just learned the concept of jack-o-lanterns over the weekend so even though Halloween is over, I think we still may carve our pumpkins from the pumpkin patch. Stickers are fun but you can't beat pulling slimy seeds out of a real pumpkin!


Sunday night was the Trunk or Treat event at our church. To go along with the boys' costumes, Deric and I "built" a castle out of sofa boxes, duct tape, scrap wood and leftover church play decorations. (And to be fair, I saw the idea of a drawbridge on Pinterest, of course.) I was pretty proud of our castle considering we did it all for $0! We put our candy in the trunk of the van so kids had to walk on the drawbridge and reach inside for the candy. Most kids were pretty excited to see the castle and walk on the drawbridge, which is all we hoped for! (It also made a good backdrop for pictures of our knight and dragon!)
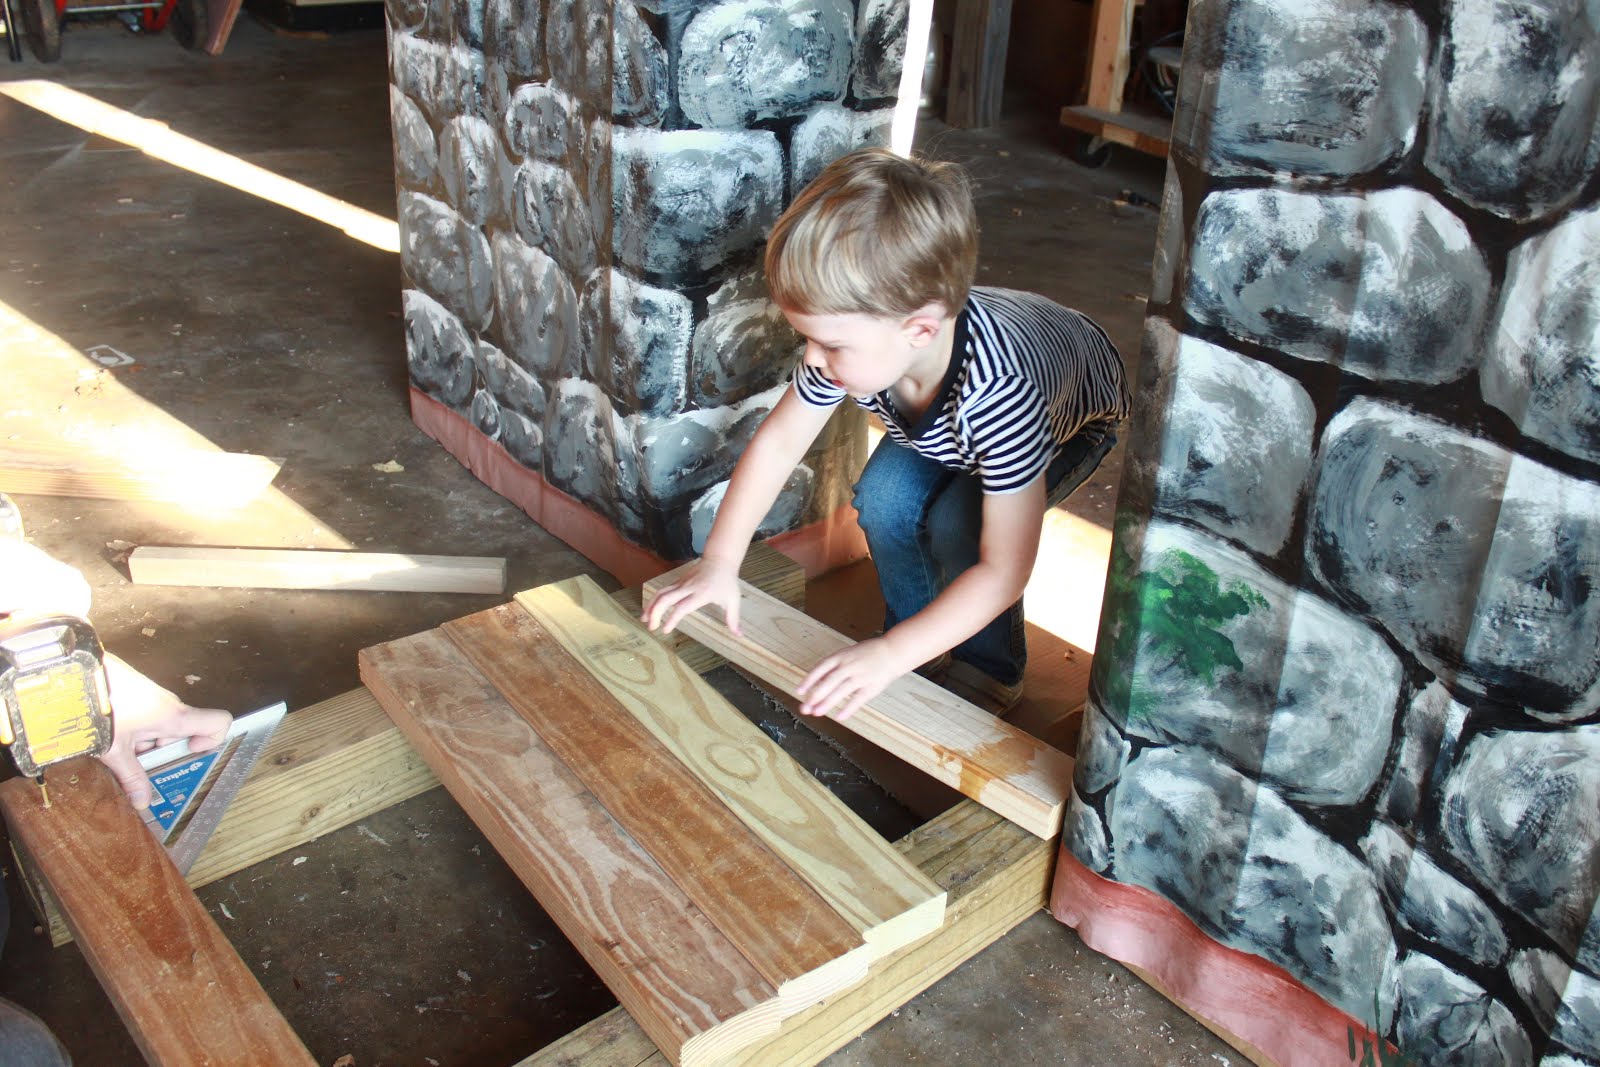
Helping Dad make the drawbridge on Saturday morning.

A knight defending his castle!


Pausing while in line for a trunk to take a picture WITH my boy rather than just of my boy!


And finally on Monday, we ate dinner with our friends, the Bryants, and trick or treated in their neighborhood since our neighborhood doesn't do trick or treating. We've already got plans to go back next Halloween because did I mention the full-size Snickers?! Jake and his little friend Bailey were each other's moral support as they worked up the courage to say "Trick or treat!" and "Thank you!" loudly enough to be heard. It was so sweet to see them encourage each other to hurry to the next house and then to beam with pride when they went to the doors all by themselves.


The dragon just couldn't hang...maybe because he knew he wouldn't get any candy.

The back story on the boys' costumes: We (mostly Deric) have told Jake mostly made-up stories at bedtime for probably a year, at least. His most favorite story is called "Jake and the Princess" and is Deric's CliffNotes version of "A Horse and His Boy" by C.S. Lewis,  one of the books in the Narnia series. From that story stemmed "Jake and the Princess Go Fishing" and a few other stories. Recently I've been telling him a shortened version of "The Lion, The Witch and the Wardrobe" and he just eats up these stories. They always involve knights and dragons and fighting for the good king, so it really wasn't hard to narrow down what Jake's costume should be this year. We did deliberate between a few other choices but after we got Jake the sword and shield from Disney back in September, I knew he needed to be a knight. I'll always be able to see this photos and remember this stage of playing knights and dragons and telling stories at night.


I scoured Pinterest a few weeks back to figure out a game plan to make their costumes and I was a little worried about how I'd find the base for Reid's dragon suit but I totally lucked out and found the fleece onesie at a consignment store for $3! It was actually a Ninja Turtle costume so I covered the Turtle belly with fleece; added horns, wings, spikes and a tail and Reid was the cutest dragon I've laid eyes on. It was even cuter when Deric would fly him around to chase Jake, who always insisted that Reid was a good dragon.


Jake's costume took a little longer since I had to actually use a sewing machine rather than a hot glue gun, but I'm so happy with how they turned out and most importantly, Jake loved his costume. Reid's was a *bit* warm but no one predicted it'd still feel like August at the end of October! (He mostly wore the dragon get up for photos and then we would strip him back down to a onesie.)


Holidays are just so much more fun with kids! Even though as adults we do more of the planning and preparations--and fund the whole shebang--its so fun to watch the boys experience new-to-them traditions that I remember from childhood, plus add in new traditions to our family. And now we can get excited for Thanksgiving and Christmas--as soon as the heatwave is over!


3.08.2015

No-Sew Blanket for Angel Babies

Last fall, a friend of mine lost her little girl, Olivia, about halfway through her pregnancy. Her due date was a few weeks ago and to commemorate Olivia, we made some blankets to take to nearby hospitals for other "angel babies", i.e. stillborn babies or babies who passed away at any point during the pregnancy. The no-sew blankets are cut in half and then woven back together with ribbon so that the baby can be swaddled in the blanket and when mother and baby are eventually separated, one half of the blanket remains with the baby and the other half goes home with Mom and Dad.

A friend of mine coordinated this blanket project but had a hard time finding a pattern for blankets that don't require sewing, so she asked me to post her tutorial so others can make blankets without any sewing skills.

**There are two straight edges to sew but if you want a truly no-sew blanket, use iron-on adhesive instead of sewing.


1. Fold a square baby blanket/receiving blanket in half diagonally. Cut the blanket in half down your diagonal fold (or mark the diagonal line, unfold and cut).


2. Sew the freshly cut edges. To make it easy, fold your edge in about 1/2 inch first. Then sew a straight edge. (Or use your iron-on adhesive, just follow the directions on the package.)


Like so.


3. Cut (very small!) holes for the ribbon along both freshly sewn diagonal edges. Fold the edge over about 1/2 inch and cut. I didn't measure my cuts but eyeballed them to be about an inch apart. Make tiny cuts-- keep in mind that your cut will double in length when you unfold it.


4. Line up the two pieces of the blanket with right sides of the fabric in. Weave the ribbon in and out of the blanket, leaving about a foot of ribbon on either side.


5. Tie the excess ribbon into a bow on either end. I didn't leave enough ribbon on either side, hence my miniscule bows. So learn from my mistake and make a normal-sized bow.


6. Unfold, and your blanket is finished.


When we finished our blankets, we worried for a minute that they wouldn't be big enough to swaddle the babies. But most angel babies are much smaller than a full-term baby so the blankets will cover them well. When its time for mom and baby to be separated, the ribbon can be unwoven and rewoven into one side of the blanket.


2.02.2012

Sewing My ABCs

I thought I'd show you how I sewed the alphabet for Oliver's first birthday.

You've probably seen a fabric alphabet before. (If you're on Pinterest, I know you've seen this before.)

Nevertheless, here's the behind-the-scenes for the alphabet according to Ashley (and Chez Beeper Bebe, whose tutorial I used).

1. Find a basic font and print it out. Or do what I did: lay your paper over your computer screen, and verryyy lightly, trace the letters. (My printer's low on ink.)


2. Cut the letters out. (I know, rocket science.) Flip the letters over and trace onto fabric. This makes it so you sew the backside of the letter rather than the front.


3. For each letter, make a sandwich. Two pieces of fabric with enough batting in the middle to make them squishy. Make sure you've got at least half an inch extra fabric and batting around the letter to make sewing much easier. You won't have to worry about running off the edge of the fabric.


I lucked out at the store and found this Christmas "snow" for .94 cents so I didn't have to buy expensive batting. Shook off the glitter and I was good to go.


4. Disregard step two and trace the front of the letter (it really doesn't matter-- I covered the pen with my stitches). Pin the fabric + batting together. You'll notice I don't have much extra fabric around the letter. I had to redo this letter because while sewing I accidentally ran off the edge of the fabric, resulting in the batting sticking through the stitches.


 5. Experiment with stitches. I practiced with the letter L since its a simple letter. I tried a straight stitch and zigzag. Straight stitches were easier, but zigzag looked better. Plus, I think zigzag will be more durable over time. Maybe, maybe not. I used a bunch of fabric from my scrap bin, so I had to learn which fabrics frayed and which ones didn't. Unless you're a master seamstress and therefore aren't reading my tutorial because you know what you're doing, I recommend sewing a few experimental letters.


6. Once you've decided on fabrics and stitches, get going. Twenty-six letters takes a while. Turn on music (or watch Burn Notice on Netflix) and sew away. I did the straight letters first until I got comfortable enough to sew curves.

7. Once you've sewed your letters, cut each letter out. I cut about an eighth of an inch from my seam. I tried to sew the letters so that the batting didn't show, but I couldn't make it work. I just did my best to cut nice clean lines so the letters didn't look sloppy. If you look closely, you can see the batting peeking out. No big deal. Add Fray Check around the edges if you like.


8. Stretch out the kink in your neck and back, and you're finished! If I'd had time, I would have sewn a simple drawstring bag to keep the letters in. But considering I cut out the last few letters on the way to the party, a bag didn't happen. Marissa, I'll let you take care of that. ;)


Like I said before, my tutorial obviously isn't comprehensive. If you're looking for a more detailed tutorial, check out Holly's tutorial-- she made her letters magnets. Or Stitching in the Dark's--she sewed a basket to store her letters.

This is a great project for practicing your sewing skills. Seeing as I still have trouble sewing straight lines, I should probably work on a few more alphabets!

P.S. Mom, I think you should know I used part of my Rugrats pillowcase for the S and the V. It was a tough sacrifice to make, but I did it! ;)
Photobucket

8.26.2011

5 Months, 3 Days

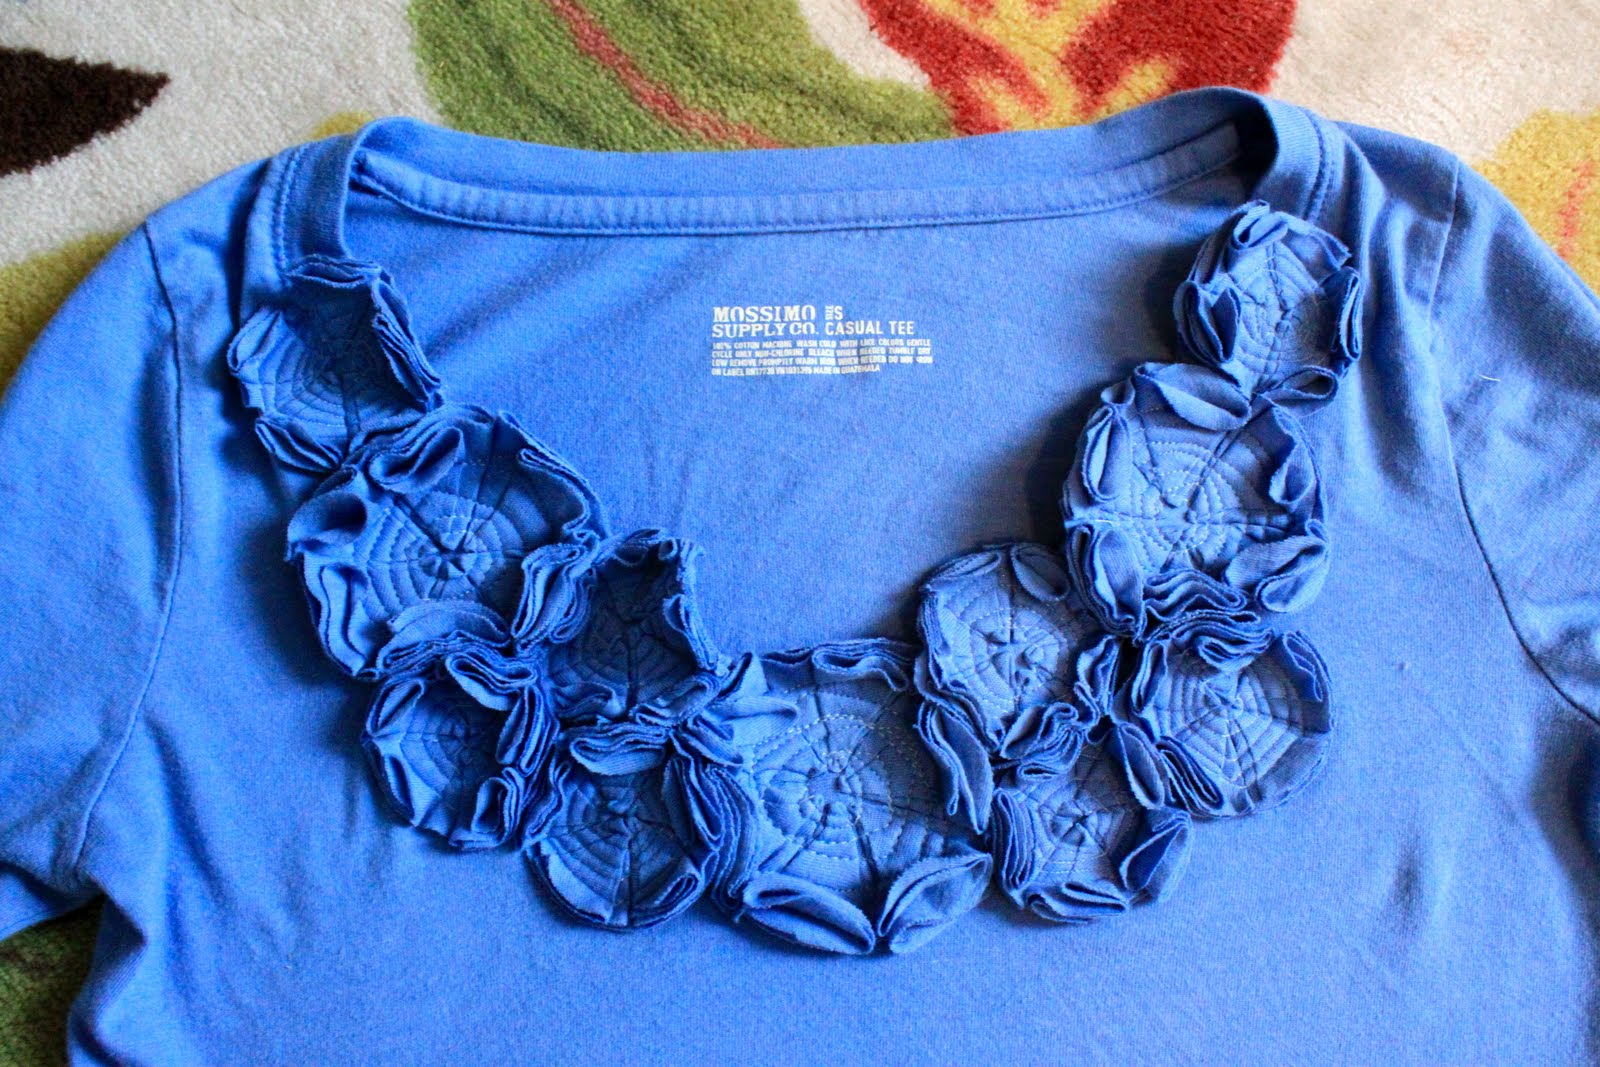
That's how long it took me to finally finish this embellished tee from Make It Love It. Five months ago I bought the shirts...that's sad. But its done and now I'm waiting for the temperatures to cool down (please God! it was 95 at 6:00 last night) enough for me to wear it. 


Now, I'm not sure what happened, but my shirt didn't turn out much like the tutorial. In the tutorial, Ashley tells you to turn the v-neck into a scoop neck by adding fabric to the bottom of the V. I did that and sewed a flower on it only to have the flower bend forward because it wasn't supported enough. So I ditched the scoop neck and kept it to the V. 


The other difference is the layout of the flowers. I tried to eyeball her design and make it the same (which should have worked, seeing as the flowers were all the same size). But my flowers seemed to be too big, so I decided to change up the design a bit and took the flowers all the way up to my collarbone.


Final verdict: I like it and will definitely wear it this winter, probably under a sweater. But in the process I learned a few things and want to try it again, maybe making the flowers smaller this time. I'll be on the look out for more $2 shirts!

3.16.2011

Lightning Fast

That's how fast I was moving on my lunch break today. (That's also how fast I tell my kids to move to clean up, finish their lunch, go to sleep, etc.) I had an hour and decided to check American Eagle for another pair of khakis for work, then return tablecloths to Target that I'd planned to make into curtains. Oh, and eat. Always important.

Ended up that AE didn't have the pants I was looking for, so that saved me some time. I headed to Target, returned the tablecloths and decided to check for khakis there too. No luck once again, BUT! I happened to walk past the 75% off rack and noticed a shirt I'd wanted to buy a few months ago. Nothing fancy, just my typical solid-color long-sleeved shirt. It was so cheap that I bought two...in the same color.


Can you see that price?? I have plans for the shirts-- I'm not buying two for no reason. Ashley from Make It & Love It used two shirts of the same color to create one embellished shirt...


Her tutorial makes it seem easy enough, so I hope that it turns out well when I try it. Even though the shirts only cost $5, I'd still hate to waste it...and a perfectly good shirt. I hope to work on it soon, but after work I usually have no desire to do anything. Then this weekend Deric and I are headed to the Upper Peninsula of Michigan to look at a church, so this weekend is definitely out. Maybe next week?

3.03.2011

Like Christmas Morning

That's how it felt yesterday morning when I was anxiously waiting for Fed Ex to drop off my brand-new sewing machine, my birthday present from Mom and Dad. (Thank you times a million!) Here she is in all her glory on my kitchen table, the only working surface with decent light. (We never eat there anyways.) 


Maybe it wasn't exactly like Christmas though, seeing as I knew what I was getting beforehand and had plenty of time to go to Walmart to pick up some basic supplies:


and stop by the library to pick out these:


I know, I know, a little ambitious. But if you look close, the bottom book is a complete photo guide, which is good for a beginner like me. The top three are for inspiration at this point. Its hard to be patient and dutifully work through the instruction manual to learn all the ins-and-outs of the machine, plus all the different stitches, tension, etc. But I'm making myself go slowly and thoroughly learn about the machine. Its a good thing, too, seeing as I've already jammed the bobbin twice... on my first day... doing a practice stitch. So, check back with me in about a year and maybe I'll have worked up to some curtains! :)